How Long Do Turntable Styluses Last? When to Replace Your Stylus
Introduction
Your turntable can look perfectly fine and still start sounding a little… off.
Maybe vocals seem harsher than you remember. Cymbals have developed an unpleasant edge. A favorite record suddenly sounds fuzzy near the end of a side. Or perhaps nothing sounds obviously wrong—you've simply realized that you've owned your turntable for years and have never once replaced the stylus.
That leads to one of the most common turntable maintenance questions:
How long does a turntable stylus actually last?
The short answer is that there is no single lifespan that applies to every stylus. Depending on the cartridge, stylus profile, manufacturer recommendations, setup, record condition, and listening habits, a stylus may need replacement after a few hundred hours of playback, while some designs are rated for considerably longer use.
More importantly, stylus wear isn't something you should judge by playback hours alone.
A stylus can become damaged long before reaching its expected lifespan. A dirty stylus can produce symptoms that resemble wear when it isn't actually worn. And many problems blamed on an old record player needle are caused by dirty records, incorrect tracking force, improper cartridge alignment, or other turntable setup issues.
This guide will help you understand what is actually happening.
We'll explore how long different turntable styluses typically last, the warning signs that yours may need replacing, how to distinguish physical wear from dirt or setup problems, and the practical maintenance habits that can help preserve playback quality and protect your vinyl records.
1. How Long Does a Turntable Stylus Last?
There is no universal replacement interval for every turntable stylus.
As a practical starting point, stylus life is generally discussed in terms of hundreds of playback hours. Depending on the stylus design and cartridge model, manufacturer recommendations can range from around 300 hours to approximately 1,000 hours or more under appropriate conditions.
For example, Audio-Technica specifies different expected lifespans for different stylus designs in its VM cartridge range:
| Stylus Type | Approximate Manufacturer Reference |
|---|---|
| Conical | 300–500 hours |
| Elliptical | 300 hours |
| Shibata | 800 hours |
| MicroLine | 1,000 hours |
These figures are specific to the manufacturer's referenced products, not universal lifespan guarantees. Ortofon also notes that some styli can deliver up to approximately 1,000 hours without performance degradation when properly maintained.
Always check the replacement guidance for your specific cartridge and stylus model.
Stylus shape, cartridge design, tracking force, record cleanliness, setup accuracy, and listening habits all influence how long a stylus remains in good condition.
So instead of treating a number such as "500 hours" or "1,000 hours" as a universal rule, use this principle:
The replacement guidance for your specific cartridge should take priority over a generic stylus-life estimate.
Stylus Life Is Better Measured in Hours Than Years
A stylus wears as it plays records.
That sounds obvious, but it changes how you should think about replacement.
Two people can buy the same turntable on the same day and need replacement styli at completely different times.
One person might play two albums every Sunday.
Another might listen to records for three hours every evening.
After one year, their turntables are the same age. Their styli aren't.
That's why "replace your needle every two years" isn't particularly useful advice.
Your actual listening time tells you much more.
What Do 300, 500, or 1,000 Hours Mean in Real Life?
Here's a rough way to translate playback hours into everyday listening:
| Average Listening Time | 300 Hours | 500 Hours | 1,000 Hours |
|---|---|---|---|
| 2 hours/week | About 2.9 years | About 4.8 years | About 9.6 years |
| 5 hours/week | About 14 months | About 1.9 years | About 3.8 years |
| 10 hours/week | About 7 months | About 11.5 months | About 1.9 years |
| 20 hours/week | About 3.5 months | About 5.8 months | About 11.5 months |
These numbers are not replacement recommendations. They simply illustrate how quickly playback hours can accumulate.
Someone who listens casually may take years to reach a manufacturer's recommended service interval. A frequent listener who plays records every evening may reach it much sooner.
Do You Need to Track Every Record You Play?
Probably not.
For most listeners, that would turn an enjoyable hobby into accounting.
A simpler approach is to note the date when you install a new stylus and estimate your average weekly listening time.
If you listen for about six hours each week, for example, that's roughly 300 hours per year.
That's usually enough to give you a useful maintenance reference.
If you're a frequent listener or simply enjoy keeping detailed records, a note on your phone or a simple spreadsheet can make tracking easier.
Remember that playback-hour estimates are only one part of stylus maintenance. Physical damage, abnormal wear, and manufacturer guidance should always take priority over an estimated replacement date.
2. What Actually Wears Out on a Turntable Stylus?

Vinyl playback is a physical process.
When you lower the tonearm, the stylus tip enters the record groove. As the record rotates, the stylus follows microscopic groove modulations. These mechanical vibrations travel through the cantilever into the cartridge, the generator inside the cartridge converts this mechanical movement into an electrical signal.
That signal eventually becomes the music coming from your speakers.
The whole process depends on precise physical contact between the stylus and the record groove.
The Stylus Tip Is Extremely Hard—but Not Immortal
Most modern turntable styli use diamond because it is exceptionally hard and capable of tracing record grooves accurately.
But even a diamond stylus is not immune to wear or physical damage.
During playback, the stylus maintains continuous contact with the record groove. Over time, repeated contact can gradually change the geometry of the surfaces that interact with the groove.
Dust, contamination, improper tracking conditions, and accidental physical contact can also contribute to wear or damage.
The process is often gradual, which is part of the problem: stylus wear rarely announces itself overnight.
Instead, playback performance may deteriorate slowly enough that you become accustomed to the change without immediately noticing it.
The Stylus Doesn't Work Alone
It's also important to remember that stylus condition is only one part of the playback equation.
Performance depends on the relationship between:
-
Stylus
-
Cantilever
-
Cartridge
-
Tonearm
-
Tracking force
-
Cartridge alignment
-
Anti-skate, where applicable
-
Record condition
-
Turntable stability
Each component contributes to how accurately and consistently the stylus follows the record groove.
That's why replacing the stylus should not be your automatic response every time something sounds wrong.
A dirty record, incorrect tracking force, poor cartridge alignment, or an unstable turntable can all affect playback.
Good troubleshooting starts by looking at the system as a whole.
3. 7 Signs Your Turntable Stylus May Need Replacing
A worn stylus doesn't always produce one obvious symptom.
Instead, look for changes that appear consistently across multiple clean records.
One scratchy thrift-store LP doesn't tell you much. Several clean records that suddenly sound distorted are much more meaningful.
Here are seven warning signs worth paying attention to.
1. Familiar Records Start Sounding Distorted
This is one of the most useful warning signs.
Choose an album you know extremely well.
If clean records that previously sounded good begin developing distortion—particularly on vocals, cymbals, strings, or complex passages—the stylus deserves attention.
You might hear:
-
Fuzziness around vocals
-
Harsh treble
-
Rough-sounding cymbals
-
Congested loud passages
-
Distortion near the inner grooves
-
A generally strained presentation
Distortion toward the inner grooves can be associated with stylus wear, but it can also result from cartridge alignment, stylus geometry, or other tracking issues.
Before replacing the stylus, clean it, check the record, and verify your turntable setup.
2. Sibilance Becomes More Noticeable
Sibilance is the exaggerated, splashy, or distorted sound that can occur around vocal consonants such as "S" and "SH."
Some recordings naturally contain more sibilance than others.
What matters is a change.
If a vocal recording you've played dozens of times suddenly produces aggressive or distorted "S" sounds, check the stylus and turntable setup.
Persistent sibilance across several clean records can point toward tracking problems or stylus wear. However, cartridge alignment, tracking force, and the recording itself can also influence how pronounced sibilance sounds.
3. High Frequencies Lose Clarity
Stylus deterioration doesn't always sound dramatic.
Sometimes the music simply becomes less convincing.
Cymbals may sound rougher or lose definition. Acoustic instruments may sound less natural. High-frequency details may become less clear, particularly during demanding musical passages.
This can be difficult to recognize because stylus wear develops gradually, and your ears may adapt to the change.
A useful test is to keep one or two clean, familiar records as reference albums.
You don't need an audiophile test pressing. You need music you know.
4. Your Turntable Begins Mistracking
Mistracking happens when the stylus cannot follow the record groove accurately.
You may hear distortion, unstable playback, or other unwanted changes, especially during demanding passages.
Stylus wear can contribute to mistracking, but so can:
-
Incorrect tracking force
-
Poor cartridge alignment
-
Dirt on the stylus
-
Dirty records
-
A damaged record
-
Improper tonearm setup
If your turntable has adjustable tracking force, check the manufacturer's recommended specification before assuming the stylus is worn.
Avoid simply increasing tracking force to stop mistracking. Both excessive and insufficient tracking force can cause playback problems.
5. Records Begin Skipping More Often
Skipping deserves investigation, but it isn't proof of stylus wear.
Ask yourself:
Does it happen on one record or many?
If one used LP skips at exactly the same point every time, inspect that record for scratches, damage, or other groove problems.
If several previously reliable records begin skipping, check:
-
Stylus cleanliness
-
Record cleanliness
-
Turntable level
-
Tracking force
-
Cartridge alignment and anti-skate, where applicable
-
Vibration and stylus condition
A turntable placed too close to speakers can also experience unwanted vibration or acoustic feedback that interferes with playback.
6. The Cantilever Looks Bent or Damaged
This is different from normal gradual stylus wear.
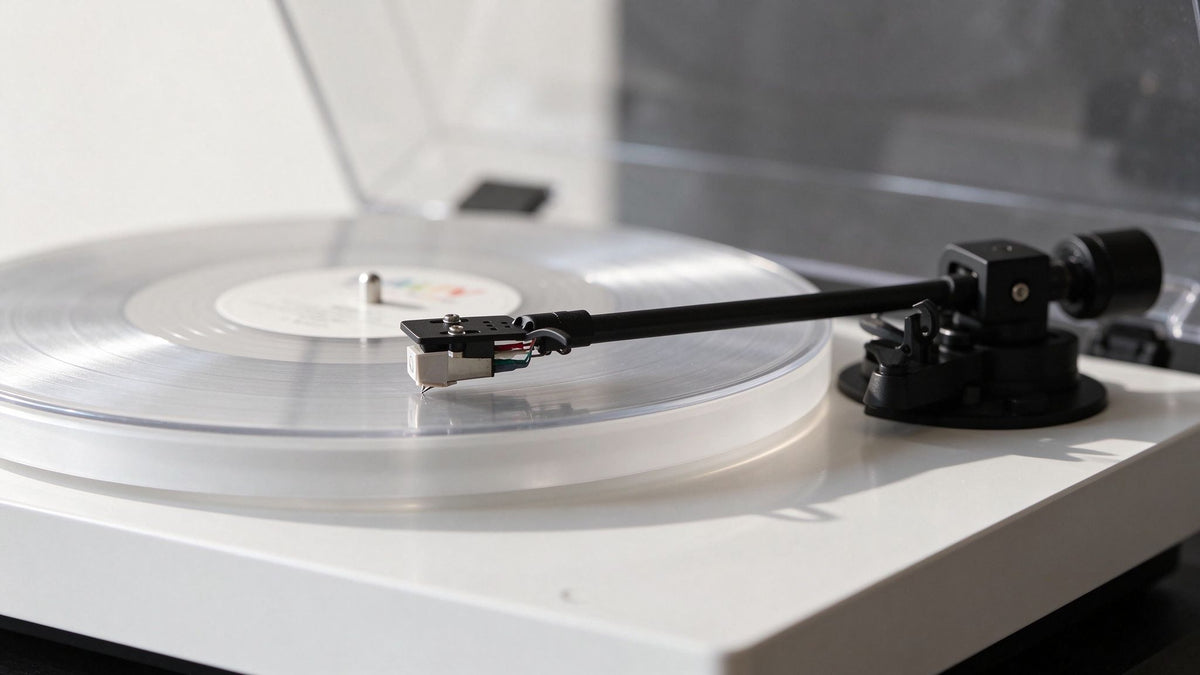
The cantilever is the small shaft that connects the stylus tip to the cartridge's internal generator.
If it looks bent, twisted, loose, or badly misaligned, stop using the turntable until the cartridge has been inspected.
Don't try to straighten it with your fingers.
Physical damage can happen when someone accidentally drops the tonearm, brushes the cartridge sideways, catches the stylus while cleaning, or mishandles the stylus guard.
A stylus with only ten hours of playback may need replacement if it has been physically damaged.
Also remember that ordinary visual inspection cannot reliably reveal all forms of diamond stylus wear. A stylus microscope or suitable magnification may be needed to examine the tip properly.
7. You've Reached the Manufacturer's Recommended Interval
Sometimes there isn't an obvious warning sign.
The stylus still plays music. Nothing sounds catastrophically wrong.
But you've reached the manufacturer's suggested replacement interval.
That's useful information.
Because wear develops gradually, waiting until the stylus sounds obviously terrible isn't the ideal maintenance strategy.
Follow the replacement guidance for your specific cartridge and stylus model, even if you haven't noticed a dramatic change in sound.
Think of listening hours as one part of the diagnosis—not the entire diagnosis.
4. Dirty Stylus or Worn Stylus? Check Before You Replace It

This is where many turntable owners replace a stylus before checking the simpler possibilities.
A dirty stylus can produce symptoms that resemble a worn one.
Dust and fibers can collect around the stylus tip during normal playback. When enough debris accumulates, you may notice:
-
Duller sound
-
Distortion
-
Reduced detail
-
Increased surface noise
-
Tracking problems
Before ordering a replacement, perform a basic check.
Step 1: Stop the Turntable
Turn off the turntable and wait until the platter has completely stopped.
Return the tonearm to its rest and secure it before cleaning.
If your cartridge has a removable stylus guard, handle it carefully and follow the manufacturer's instructions.
Never attempt to clean the stylus while the platter is spinning.
Step 2: Inspect the Stylus in Good Light
You don't need a laboratory microscope to spot obvious contamination.
Use bright, indirect lighting and look for visible dust or fibers around the stylus tip.
A phone flashlight can help, provided you position it carefully to avoid excessive glare.
What you cannot reliably do with your naked eye is determine normal microscopic stylus wear.
A stylus can look perfectly fine from a normal viewing distance and still have significant wear on its groove-contact surfaces.
Visual inspection is most useful for identifying visible contamination and obvious physical damage, not determining the remaining lifespan of a diamond tip.
Step 3: Clean the Stylus Properly
Follow the cleaning instructions provided by the cartridge or stylus manufacturer.
A dedicated stylus brush is a common cleaning tool, but the technique matters.
For a conventional stylus brush, use gentle strokes from the rear of the cartridge toward the stylus tip, following the manufacturer's instructions.
Avoid:
-
Brushing from the stylus tip toward the cartridge
-
Side-to-side brushing
-
Applying pressure to the cantilever
-
Touching the stylus tip with your fingers
-
Using unapproved household cleaning chemicals
Some manufacturers also recommend specific cleaning fluids or other cleaning methods. Use only products confirmed to be compatible with your particular stylus.
A cartridge is a precision component. Treat it like one.
For a practical cleaning routine, explore AUDURA's record care accessories.
Step 4: Clean the Record
Now remove another obvious variable.
Use a clean record in good condition. If necessary, remove surface dust with a suitable record brush or use an appropriate record-cleaning method.
Follow the cleaning product's instructions and allow the record to dry completely before playback.
Avoid household cleaning products that are not designed for vinyl records.
A dirty stylus playing a dirty record doesn't tell you much about the actual condition of either one.
Keeping both clean helps create more consistent playback conditions.
Explore AUDURA's record care accessories for practical vinyl maintenance.
Step 5: Replay Something You Know Well
Choose a familiar passage with clear vocals, treble detail, and recognizable musical characteristics.
Listen again after cleaning.
If playback improves noticeably, contamination was likely contributing to the problem.
If distortion remains across several clean records, continue troubleshooting rather than immediately assuming the stylus is worn.
Compare playback under similar listening conditions to make the difference easier to recognize.
Step 6: Check the Turntable Setup
If your turntable allows adjustments, verify that the relevant settings match the manufacturer's specifications.
In particular, check tracking force.
A common misconception is that less tracking force must always be safer for records.
It isn't.
If tracking force is too low, the stylus may fail to follow the groove accurately. Excessive tracking force can also contribute to unnecessary wear.
Use the recommended tracking force for your specific cartridge, and consider a suitable stylus force gauge when accurate measurement is needed.
Also check cartridge alignment and anti-skate settings, where applicable.
The goal isn't the lightest possible setting.
It's the correct setting.
5. Can a Worn Stylus Damage Your Records?
This question matters more than whether a worn stylus simply sounds worse.
A significantly worn or physically damaged stylus can potentially damage record grooves.
The stylus is designed to contact the groove in a specific way. As its groove-contact surfaces wear down—or if the diamond tip or cantilever becomes damaged—it may no longer trace the groove as intended.
Under these conditions, playback can become less accurate and the risk of groove damage may increase.
That's why "I'll use it until it sounds terrible" isn't the maintenance approach we'd recommend.
Vinyl Damage Is Different From Dirt
Dust can be cleaned.
Static can be reduced.
Fingerprints and oily residue can often be reduced or removed with appropriate record-cleaning methods.
Physical groove damage is different.
Once groove walls have been permanently damaged, cleaning cannot restore the missing information.
This is an important distinction: cleaning can remove contamination, but it cannot reverse physical damage to a record.
It doesn't mean a stylus becomes dangerous the moment it passes a particular number of playback hours.
It means you should treat stylus condition as part of routine turntable maintenance rather than waiting indefinitely for obvious sound problems.
Use Three Signals Together
A practical replacement decision should consider three things:
1. Playback Hours
How much has the stylus actually been used?
Keep an approximate record of your listening time and compare it with the recommended lifespan for your specific stylus.
2. Manufacturer Guidance
What does the manufacturer of your cartridge or replacement stylus recommend?
Different stylus profiles and designs can have different service-life expectations. Use the guidance for your specific model rather than relying on a universal replacement interval.
3. Playback Behavior
Has sound quality or tracking performance changed across multiple clean records?
Persistent distortion, increased sibilance, or mistracking can indicate a problem, although these symptoms may also have other causes.
When these signals begin pointing in the same direction, replacement becomes a much easier decision.
One important exception: if you notice obvious physical damage, such as a bent cantilever or a visibly damaged diamond tip, stop playback and arrange a replacement. Don't continue playing records just to confirm the problem.
If you want to reduce unnecessary contamination during everyday listening, proper record cleaning is a useful place to start.
6. What Can Shorten Stylus Life?
Normal stylus wear is unavoidable.
Unnecessary wear and accidental damage are not.
Several everyday habits can put extra stress on your stylus, accelerate wear, or increase the risk of physical damage.
Playing Very Dirty Records
Buying used vinyl is one of the joys of collecting.
But a dusty record that has spent 30 years in a cardboard box shouldn't necessarily go straight onto your turntable.
Inspect secondhand records before playing them.
If you find visible dirt, dust buildup, or other contamination, clean the record using an appropriate vinyl-cleaning method before playback.
Your goal isn't to make every LP laboratory-clean. It's to avoid repeatedly playing records with heavy contamination that could interfere with proper stylus contact and playback.
Incorrect Tracking Force
Always follow the recommended tracking force for your specific cartridge and stylus.
Too little force can cause mistracking, while excessive force can place unnecessary pressure on the stylus and record grooves.
If your turntable has an adjustable counterweight, follow the manufacturer's setup procedure and use an appropriate stylus force gauge when necessary.
However, not every turntable is designed for user adjustment.
If your turntable comes with factory-configured settings and isn't intended to be adjusted, don't start changing tracking force, anti-skate, or tonearm settings simply because you saw someone adjusting a different turntable online.
Always follow the instructions for your particular model.
Aggressive Stylus Cleaning
The irony of stylus care is that you can damage the stylus while trying to clean it.
Avoid:
-
Sideways scrubbing
-
Applying excessive pressure
-
Touching or pulling the cantilever with your fingers
-
Using unapproved solvents or cleaning fluids
-
Using household cleaners
-
Pushing or pulling against the stylus assembly
Use a suitable cleaning tool, gentle movements, and the cleaning direction recommended by the manufacturer.
Gentle and correct beats aggressive and frequent.
Dropping the Tonearm
Use the cueing mechanism when available.
Manually lowering a tonearm can be part of the vinyl listening ritual, but the important thing is to control its descent.
A cueing lever provides a more controlled movement and helps reduce the risk of accidentally dropping the stylus onto the record.
Avoid allowing the stylus to strike the record surface suddenly. Even a single accidental impact can damage a delicate stylus assembly.
Letting the Stylus Run Unnecessarily
If your turntable doesn't have an automatic stop function, don't leave it running in the runout groove for hours.
A few extra minutes while you finish making coffee isn't a crisis.
Regularly falling asleep with the turntable spinning all night is different.
The stylus remains in contact with the record while the platter rotates, even after the music has finished.
Those are still playback hours, and they contribute to overall stylus use.
7. How to Make Your Turntable Stylus Last Longer
Good stylus care doesn't require an elaborate maintenance ritual.
A few consistent habits can help reduce unnecessary wear, prevent accidental damage, and keep your records in better condition.
Keep Your Records Reasonably Clean
Loose dust should be removed before it becomes part of the listening experience.
Handle records by their edges and label, use appropriate record-cleaning tools, and deep-clean dirty records when necessary.
If you buy used vinyl regularly, proper record cleaning becomes even more valuable.
Always follow the cleaning product's instructions and allow records to dry completely before playing them.
Store Records Properly
Store records vertically rather than stacking them horizontally.
Use clean, suitable inner sleeves to help protect the record surfaces.
Keep your collection away from excessive heat, direct sunlight, and environments with significant temperature fluctuations.
Avoid packing records so tightly that they are difficult to remove or become compressed.
Record care and stylus care are connected: cleaner, properly stored records help provide more consistent playback conditions and reduce unnecessary contamination around the stylus.
Keep the Stylus Free of Debris
Check the stylus periodically.
If you notice a visible buildup of dust or fibers around the stylus tip, don't ignore it.
Clean it according to the cartridge or stylus manufacturer's instructions, using an appropriate cleaning tool and technique.
You don't need to clean it aggressively or follow an arbitrary daily schedule. Regular inspection and careful cleaning when needed are more important.
Use Correct Tracking Force
If your turntable provides adjustable tracking force, make sure it matches the manufacturer's recommendation for the installed cartridge and stylus.
Don't rely on approximate settings or copy the tracking force used by another cartridge.
If you install a different cartridge or stylus, check whether the setup requirements have changed.
For turntables with factory-configured settings that aren't intended for user adjustment, follow the manufacturer's instructions rather than attempting to recalibrate them.
Protect the Stylus When Moving the Turntable
Moving apartments?
Rearranging your listening room?
Transporting the turntable?
Secure the tonearm and use the appropriate stylus guard, if provided.
Follow the manufacturer's transportation instructions for securing or removing other components, such as the platter or counterweight, where applicable.
Use suitable packaging to protect the turntable from movement and impact during transportation.
Some stylus damage happens outside normal playback—not while listening, but during cleaning, handling, moving, or rearranging equipment.
A little preparation can prevent an expensive and frustrating accident.
Write Down the Installation Date
This may be the easiest maintenance habit in this entire guide.
When you install a new stylus, make a note:
Stylus installed: [Month, Year]
Then keep an approximate idea of how often you listen.
You don't need perfect data or a complicated tracking spreadsheet. A simple estimate of your listening hours can help you compare actual use with the manufacturer's recommended replacement interval.
The installation date alone won't tell you when a stylus needs replacing, but it gives you a useful starting point.
It helps you avoid reaching the point where your answer to "How old is this stylus?" is:
"I have absolutely no idea."
8. How to Replace a Turntable Stylus
First, an important distinction:
Replacing a stylus is not always the same as replacing a cartridge.

Stylus vs. Cartridge
The stylus is the part that physically contacts the record groove. It typically includes a diamond tip attached to a small cantilever, which transfers groove vibrations to the cartridge's internal generator.
On many cartridge designs, these components are part of a removable stylus assembly that can be replaced separately.
The cartridge is the larger component mounted to the tonearm or headshell. It converts the mechanical movement transmitted by the stylus into an electrical audio signal.
Many moving-magnet (MM) cartridges allow you to replace the stylus assembly without replacing the entire cartridge.
That's convenient because replacing a complete cartridge may also require cartridge alignment and additional setup.
However, not every cartridge is designed for user-replaceable styluses. Some models require professional servicing or a complete cartridge replacement.
Always check the design of your specific cartridge before ordering parts.
Before Ordering a Replacement
Before buying a replacement, identify the exact cartridge model and check which stylus assemblies are designed to fit it.
Then confirm:
-
Correct replacement stylus: Make sure the part is designed for your specific cartridge.
-
Manufacturer compatibility: Check the manufacturer's compatibility information rather than relying on appearance or brand name alone.
-
Installation method: Confirm whether the stylus assembly is designed to be user-replaceable.
-
Tracking force: Check the recommended tracking force for the replacement stylus.
-
Additional setup requirements: Find out whether any tracking force, alignment, or other adjustments are required after installation.
Don't buy a stylus simply because it looks like yours.
Cartridge compatibility isn't determined by visual similarity.
A General Stylus Replacement Process
The exact method varies by cartridge, so always follow the manufacturer's instructions first.
For a typical user-replaceable stylus assembly, the general process is:
-
Turn off the turntable and remove the record.
-
Return the tonearm to its rest and secure it.
-
If recommended by the manufacturer, fit the stylus guard before handling the cartridge.
-
Remove the old stylus assembly according to the specified procedure.
-
Avoid touching the diamond tip or cantilever.
-
Position the compatible replacement assembly in the specified direction.
-
Carefully install it until it is properly seated, without forcing it.
-
Check the installation and recheck tracking force or other settings if required.
-
Test playback with a clean, familiar record.
If something feels as though it needs significant force, stop.
A stylus assembly should not require you to wrestle with the cartridge.
Confirm that you're using the correct replacement part and installation method before trying again.
If the assembly won't fit correctly or you're unsure about the procedure, consult the cartridge manufacturer or a qualified turntable technician rather than risking damage to the new stylus.
9. Should You Replace the Stylus or Upgrade the Cartridge?
A worn stylus sometimes becomes an excuse to start shopping.
That's not necessarily a bad thing—but an upgrade isn't automatically the better decision.
The right choice depends on the condition of your current cartridge, the availability of compatible replacement parts, and what you want from your listening system.
Replace the Stylus When You're Happy With Your Setup
If you're happy with your current sound and a compatible replacement stylus is available, replacing the stylus assembly is often the simplest option.
You keep the cartridge you know.
You avoid unnecessary changes.
And, depending on the cartridge design, you may avoid the additional work involved in installing and aligning an entirely new cartridge.
For many listeners, that's exactly what good maintenance should look like.
Just make sure the replacement stylus is approved for your specific cartridge and check whether any setup adjustments, such as tracking force, are required after installation.
Consider a Cartridge Upgrade When You Have a Specific Goal
An upgrade makes more sense when you know why you're upgrading.
Maybe you want:
-
A different stylus profile
-
Different tracking characteristics
-
A particular sonic presentation
-
Compatibility with a different or upgraded audio system
-
An alternative cartridge because a compatible replacement stylus is no longer available
But cartridge upgrades introduce more variables.
Before choosing a new cartridge, consider:
-
Tonearm compatibility: Effective mass and cartridge compliance should be considered together.
-
Mounting compatibility: Check the cartridge mounting standard and available adjustment range.
-
Tracking force: Confirm that the tonearm can accommodate the cartridge's recommended tracking-force range.
-
Cartridge alignment: Make sure the cartridge can be positioned correctly on your tonearm.
-
Physical clearance: Check that the cartridge and stylus have sufficient clearance during operation.
-
Phono-stage compatibility: Consider cartridge type, output level, and the phono preamp's gain and loading requirements, where applicable.
A more expensive cartridge installed incorrectly can perform worse than a modest cartridge that is properly set up.
In practice, correct setup and system compatibility matter more than price or specifications alone.
10. How Often Should Different Vinyl Listeners Check Their Stylus?
Your listening habits can help determine how closely you should monitor stylus wear.
There's no universal inspection schedule, but different listening patterns call for different maintenance habits.
The Weekend Listener
You put on an album over breakfast, while cooking, or on a Sunday afternoon.
Your playback hours may accumulate slowly, making stylus replacement a relatively occasional maintenance task.
Your biggest priorities are likely to be keeping records reasonably clean, checking the stylus for visible debris, and avoiding accidental damage.
Even if you don't listen often, periodic inspection is still worthwhile.
The Everyday Listener
Your turntable is part of daily life.
You put on records after work, during dinner, or while reading.
At five to ten hours per week, playback time adds up more quickly than you might expect.
Keeping a record of when you installed your stylus and estimating your weekly listening hours can help you monitor its usage against the manufacturer's recommended replacement interval.
The Heavy Collector
You listen for several hours on most days and regularly spend extended periods enjoying your record collection.
For you, a stylus is a consumable playback component that deserves closer attention.
Track your approximate playback hours, inspect the stylus regularly, and keep the manufacturer's replacement recommendations in mind.
If you rely on your turntable frequently, keeping a compatible replacement stylus on hand may also be convenient. Just make sure it matches your cartridge and is stored according to the manufacturer's instructions.
The Used-Turntable Buyer
You bought a secondhand turntable and have no idea how the previous owner maintained it.
This is one of the most difficult situations because you don't have a reliable starting point.
The stylus might have 30 hours on it.
It might have 1,500.
Without a verifiable usage history, you can't reliably estimate how much useful life remains.
A visual inspection can reveal obvious contamination or physical damage, but it cannot confirm that the diamond tip is free from microscopic wear.
If the stylus history is unknown, installing a compatible replacement from a reliable source can be a sensible way to establish a known maintenance baseline—especially before playing valuable records.
First, identify the exact cartridge model and confirm which replacement stylus is compatible.
11. Stylus Care on AUDURA Turntables
The same basic stylus-care principles apply whether your setup is simple or highly adjustable.
Current AUDURA Play, Pure, One, and Core models use an Audio-Technica AT3600L moving-magnet cartridge, providing a familiar cartridge platform with a replaceable stylus.
However, setup and adjustment options vary by model. Always follow the instructions and specifications for the particular AUDURA turntable you own.
AUDURA Pure
AUDURA Pure is designed around a straightforward dedicated-turntable experience.
It comes with a pre-installed Audio-Technica AT3600L cartridge, making it easy to get started with vinyl while retaining the convenience of a replaceable stylus.
For Pure owners, routine care is mostly about the fundamentals:
Keep records clean, keep the stylus free of debris, handle the tonearm carefully, and use a compatible replacement stylus when necessary.
Follow the specified tracking-force requirements rather than making adjustments based on another turntable's setup.
There's no benefit in turning routine maintenance into unnecessary tweaking.
AUDURA Play
AUDURA Play combines a belt-drive turntable with integrated stereo speakers in one system.
It comes with a pre-installed Audio-Technica AT3600L cartridge, a replaceable stylus, and an adjustable counterweight.
This gives owners the flexibility to check and set tracking force when required, while keeping everyday listening straightforward.
As your listening hours accumulate, stylus replacement can remain part of normal ownership rather than requiring an entirely new turntable.
AUDURA One
AUDURA One combines a turntable with dedicated external stereo speakers to create a complete vinyl listening system.
Its Audio-Technica AT3600L cartridge provides the same familiar stylus platform used across the AUDURA range.
The maintenance principles remain the same: monitor stylus condition, keep records clean, and use the correct compatible replacement stylus when necessary.
Follow the AUDURA One setup instructions for any cartridge or tonearm-related adjustments.

AUDURA Core
AUDURA Core brings transparent acrylic construction and more setup flexibility to the listening experience.
It comes with a pre-installed Audio-Technica AT3600L cartridge and features an adjustable counterweight.
That makes one point from this guide particularly important:
When setting tracking force, follow the recommended specification for the installed cartridge.
More adjustment doesn't mean you need to constantly adjust the turntable. It simply gives you greater control when setup or component changes require it.
Core also uses a factory-preset anti-skate mechanism, which is not user-adjustable. Follow the product instructions rather than attempting to change this setting.
Whichever AUDURA system you own, stylus maintenance should stay simple:
Clean records. Clean stylus. Correct setup. Careful handling. Replace when appropriate.
12. A 5-Minute Stylus Health Check
Wondering whether your turntable stylus needs replacing? Before ordering a replacement, work through this simple checklist.
It takes only a few minutes and can help you distinguish possible stylus wear from dirt, record condition, or setup problems.
1. Check Its Age and Playback History
Do you know when the current stylus was installed?
If so, estimate how many hours it has been used.
If you don't know, make a note of that uncertainty. The age of the turntable itself doesn't tell you how much life remains in its stylus.
2. Inspect the Stylus
With the turntable switched off and the tonearm secured, look for obvious dust, fibers, or visible physical damage.
Pay particular attention to the cantilever.
If the cantilever is visibly bent or damaged, stop using the turntable.
Keep in mind that a visual inspection cannot reliably confirm microscopic diamond wear.
3. Clean It Carefully
If you see dust or debris, clean the stylus using a method approved by the cartridge or stylus manufacturer.
Follow the recommended cleaning direction and avoid applying pressure to the cantilever.
Don't use household cleaning products or unapproved fluids.
4. Choose Three Clean Records
Select three clean records that you know well, preferably in good playing condition.
Avoid using a heavily scratched or visibly contaminated secondhand record as your only reference.
Familiar recordings make it easier to notice changes in sound that you may not have heard before.
5. Listen for Consistent Changes
Play the records under similar conditions and listen for recurring symptoms, such as:
-
New or persistent distortion
-
More noticeable sibilance
-
Unusual high-frequency harshness
-
Repeated mistracking or skipping
Do similar problems appear across all three records?
If the issue occurs on only one record, its condition may be responsible. If the same symptoms appear across multiple clean records, further inspection of the stylus and turntable setup is worthwhile.
6. Check the Turntable Setup
Before concluding that the stylus is worn, check the relevant setup conditions:
-
Turntable stability and leveling
-
Tracking force, where adjustable
-
Cartridge alignment, where applicable
-
Other manufacturer-recommended settings
Use the specifications for your particular cartridge and turntable. Don't increase tracking force simply to compensate for skipping or distortion.
7. Decide Whether Replacement Is Necessary
A replacement becomes a sensible next step when:
-
The stylus has reached or is approaching the manufacturer's recommended replacement interval.
-
Playback problems persist after appropriate cleaning and setup checks.
-
The stylus or cantilever shows physical damage.
If you find visible physical damage, stop playback rather than continuing to test it.
When the stylus is simply old or its history is unknown, consider its estimated playback hours, manufacturer guidance, and performance together rather than relying on one symptom alone.
The goal is simple: avoid replacing a serviceable stylus because of a dirty record, while avoiding unnecessary record wear by continuing to use a stylus that may need replacing.
13. Common Stylus Mistakes to Avoid
Even with a basic understanding of stylus maintenance, a few common assumptions can lead to unnecessary replacements, poor playback, or avoidable record wear.
Here are six mistakes worth avoiding.
1. Assuming Every Stylus Lasts Exactly 1,000 Hours
It doesn't.
Stylus lifespan varies with the stylus design, cartridge model, manufacturer recommendations, setup, record condition, and maintenance habits.
Use the recommended replacement interval for your specific stylus rather than treating 1,000 hours as a universal rule.
2. Replacing the Stylus Every Time You Hear a Pop
A pop or click is not a reliable indicator of stylus wear.
Vinyl playback can include surface noise caused by dust, static, scratches, pressing defects, or previous record wear.
Before assuming the stylus is responsible, check the record itself and look for repeatable playback problems across several clean records.
3. Assuming Lighter Tracking Force Always Protects Records
Less tracking force doesn't automatically mean less record wear.
If the tracking force is too low, the stylus may mistrack, potentially affecting both playback quality and record grooves.
The correct approach is to use the tracking force recommended by the cartridge manufacturer, not to guess or simply choose the lowest possible setting.
4. Waiting Until the Stylus Sounds Awful
Stylus wear can develop gradually, and obvious sound-quality problems aren't always an early warning.
Some physical damage may also be difficult to identify through listening alone.
Keep track of estimated playback hours, inspect the stylus periodically, and follow the manufacturer's replacement guidance rather than waiting for a noticeable decline in sound.
5. Cleaning the Stylus Too Aggressively
The cantilever and stylus assembly are delicate components.
Use an appropriate stylus brush or another manufacturer-approved cleaning method, following the recommended direction and applying minimal pressure.
Avoid aggressive scrubbing, sideways movements, and unapproved cleaning fluids.
Careful cleaning helps. Excessive force can cause damage.
6. Buying a Generic Replacement Without Checking Compatibility
"Record player needle" is a convenient everyday search term.
It isn't a compatibility specification.
Before buying a replacement, identify the exact cartridge model and check which stylus assemblies are designed to fit it.
Two replacement styluses may look similar but still have different mounting designs or compatibility requirements.
When in doubt, check the cartridge manufacturer's documentation or the turntable manufacturer's recommended replacement part.
A compatible stylus, correctly installed and properly maintained, is more important than simply choosing a replacement that looks right.
FAQ: Turntable Stylus Lifespan and Replacement
How long does a turntable stylus last?
There is no universal stylus lifespan. Depending on the stylus design, cartridge model, manufacturer recommendations, setup, and maintenance, replacement intervals can range from a few hundred hours to around 1,000 hours for some designs. Always follow the guidance for your specific stylus.
How do I know when my turntable stylus needs replacing?
Possible warning signs include new or persistent distortion, increased sibilance, reduced clarity, mistracking, and repeated skipping across multiple clean records. Consider these symptoms alongside estimated playback hours, physical condition, and the manufacturer's recommended replacement interval.
Can a worn stylus damage vinyl records?
Yes. A significantly worn or physically damaged stylus can potentially damage record grooves. If the cantilever is visibly bent or the stylus shows obvious physical damage, stop playback immediately. If you suspect wear, have the stylus inspected or replace it with a compatible assembly when appropriate.
How often should I replace my record player needle?
Replace it according to the manufacturer's recommendations, estimated playback hours, and the stylus's condition rather than calendar age alone. A frequent listener may accumulate several hundred hours in months, while an occasional listener may take years to reach the same total.
How can I tell whether my stylus is dirty or worn?
First, clean the stylus using a manufacturer-approved method. Then test it with several clean records you know well. If playback improves, contamination was likely contributing to the problem. If similar distortion or mistracking persists across multiple records after setup checks, stylus wear or another turntable issue may be responsible.
Can you see a worn stylus with the naked eye?
You may be able to spot dust, a bent cantilever, or obvious physical damage. However, normal diamond stylus wear occurs on extremely small contact surfaces and cannot be reliably judged by ordinary visual inspection alone. Appropriate magnification and experience may be needed.
Should I replace the stylus on a used turntable?
Not necessarily, but it is worth checking carefully. If the stylus's age, playback hours, or maintenance history are unknown, replacing it with a confirmed compatible assembly can be a sensible preventive step. It gives you a known starting point for future maintenance, especially before playing valuable records.
Do I need a new cartridge when the stylus wears out?
Not always. Many moving-magnet cartridges have replaceable stylus assemblies, allowing you to keep the cartridge body and replace only the stylus. However, not every cartridge is designed for user-replaceable stylus assemblies. Check your exact cartridge model and its manufacturer's compatibility information before ordering.
Final Thoughts
A stylus is one of the smallest parts of your turntable, yet it plays a critical role in everything you hear from a record.
Fortunately, taking care of it isn't complicated.
You don't need to obsess over every hour of playback or inspect the stylus after every album. You need a few good habits: keep your records reasonably clean, keep debris off the stylus, use the correct turntable settings, handle the tonearm carefully, and keep track of roughly how much you've been listening.
Most importantly, don't diagnose stylus wear from one bad-sounding record.
Listen for patterns.
Clean first. Check your setup. Compare several familiar records. Consider playback hours and the manufacturer's guidance.
Then replace the stylus when the evidence points in that direction.
That's a much better approach than replacing parts unnecessarily—or waiting until a worn stylus causes obvious playback problems.
If you're troubleshooting a turntable, continue with our related guides:
If you're still learning how the playback system works, start with What Is a Turntable Stylus? Stylus vs. Cartridge Explained.
The goal isn't to make vinyl complicated.
It's to understand just enough about your turntable to keep the music sounding the way it should.