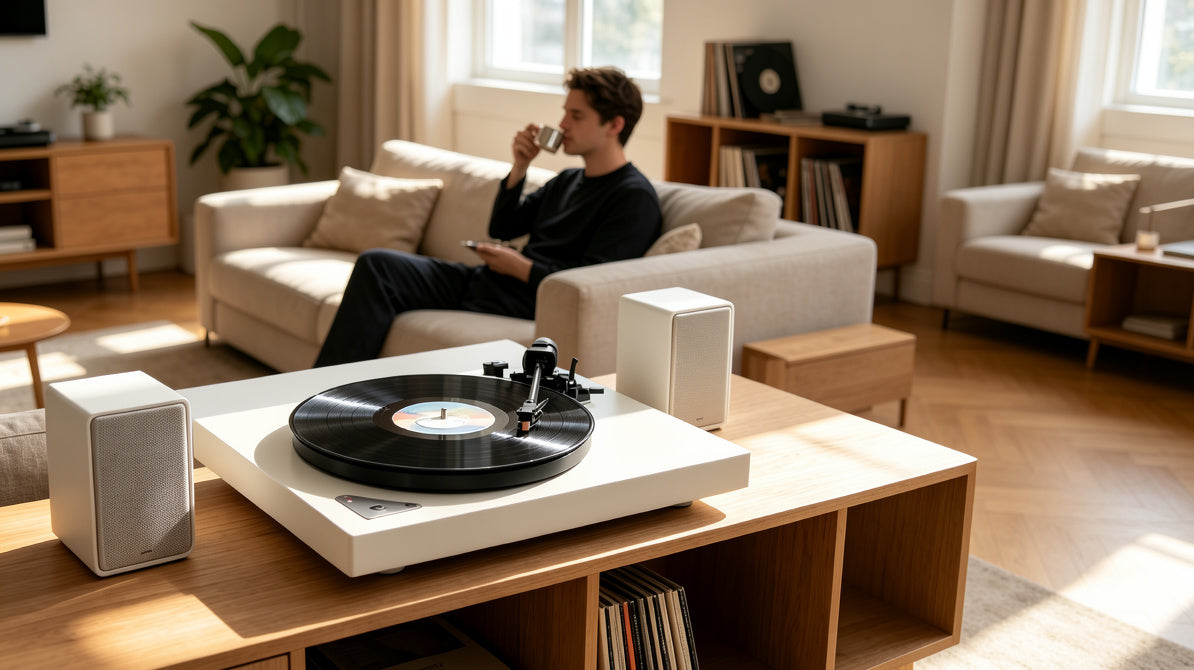
How to Set Up a Turntable in 15 Minutes: A Beginner’s Guide
Introduction: Your First Vinyl Experience Starts Before the First Spin
There is something special about playing a vinyl record for the first time.
You choose an album, carefully remove the record from its sleeve, place it on the platter, and prepare the tonearm. When the music begins, listening becomes a more intentional, hands-on experience—one that invites you to slow down and enjoy every side of a record.
Before that first spin, however, there is one important step to get right: setting up your turntable properly.
The good news is that getting started with vinyl doesn't have to be complicated. With the right placement, correct tonearm settings where applicable, and the proper audio connections, you can prepare your turntable for its first record without needing extensive audio experience or an elaborate sound system.
In many cases, a basic turntable setup can take around 15 minutes, depending on your model, how much assembly is required, and whether your speakers or audio equipment are already ready to use.
In this beginner-friendly guide, we'll walk you through the essential steps to set up a turntable, connect your audio system, and play your first vinyl record. You'll learn how to:
- Choose a stable, level surface for your turntable.
- Check the tonearm, cartridge, and tracking force according to your model's instructions.
- Connect your speakers and understand when a phono preamp is needed.
- Check the basic settings before playing a record.
- Troubleshoot common issues such as skipping, unwanted noise, and incorrect playback speed.
- Create a more enjoyable vinyl listening space at home.
Whether you're setting up your first record player in a bedroom, apartment, or living room, this guide will help you understand the essentials and get started with confidence.
Let's get your turntable ready for that first spin.
1. Before You Start: Understand Your Turntable Setup
Before connecting anything, check your model's specifications and follow the turntable setup instructions for the components and connections available on your specific model.
A turntable is the starting point of a vinyl playback system, but the additional equipment you need depends on your model. Some record players have built-in speakers or a built-in phono preamp, while others require external audio equipment.
The Basic Components of a Vinyl System
A traditional vinyl playback system may include the following components:
| Component | What It Does |
|---|---|
| Turntable | Rotates the record at the correct speed so the stylus can follow the grooves. |
| Cartridge and stylus | The cartridge converts stylus movement into an electrical audio signal. The stylus, often called the needle, makes contact with the record grooves. |
| Phono preamp | Boosts and equalizes the low-level signal from a phono cartridge. It may be built into the turntable or amplifier, or provided as a separate component. |
| Amplifier | Powers passive speakers. Some amplifiers also include a phono input or phono preamp. |
| Speakers | Turn the audio signal into sound. Powered speakers have built-in amplification, while passive speakers need an external amplifier. |
You may not need every component listed above. For example, a turntable with built-in speakers can play records without a separate speaker system. If your turntable has a built-in phono preamp and you're using powered speakers, you may not need a separate phono preamp or amplifier.
Before buying additional equipment or connecting cables, check your turntable's specifications and user manual. The right setup depends on the connections and features available on your particular model.
The goal is simple: create a setup that works with your equipment without adding unnecessary complexity.
Check Everything Inside the Box
Before you begin assembling your turntable, unpack the contents carefully and compare them with the included manual. Depending on your model, you may find:
- Turntable unit
- Platter
- Drive belt, if your turntable uses a belt-drive mechanism
- Platter mat or slip mat, depending on the model
- Tonearm counterweight, if applicable
- Headshell and cartridge, or a pre-installed cartridge and stylus
- Power adapter or power cable
- Audio cable, if included
- User manual and setup instructions
Not every turntable includes the same accessories. Some components may already be installed or adjusted at the factory, while others may need to be fitted during setup. Direct-drive models, for example, do not require a drive belt.
Before making any adjustments, check the instructions for your specific model. Avoid changing factory-set tonearm or cartridge settings unless the manual tells you to do so.
A quick inventory now can save time later and help you identify missing accessories before you start connecting your equipment.
Once you've confirmed that everything is present, you're ready to prepare the surface and position your turntable.
2. Choose the Right Location for Your Turntable
Before connecting your equipment, take a moment to choose the right place for your turntable.
Proper turntable placement helps create a stable listening environment, reduces the risk of unwanted vibration, and makes it easier to enjoy your records every day.
Choose a Stable Surface

Your turntable should sit on a flat, sturdy surface that can support its weight without wobbling or flexing noticeably.
Good options include:
- A sturdy media console.
- A well-supported shelf.
- A solid, stable cabinet.
- A firm tabletop with enough space for your turntable and records.
Avoid placing your turntable on furniture that shakes easily, shelves that sag under weight, or surfaces affected by frequent footsteps or door movement.
Also, keep your turntable away from direct sunlight, excessive heat, and damp areas. These conditions can affect the equipment and the condition of your vinyl records over time.
Why does stability matter?
A turntable's stylus follows tiny variations in a record's grooves to reproduce sound. Vibrations transmitted through furniture or from nearby equipment can interfere with playback and, in some situations, cause unwanted noise or skipping.
Choosing a stable location is one of the simplest ways to create a better starting point for your vinyl setup.
Make Sure Your Turntable Is Level
Once you've chosen a suitable surface, check that your turntable is level.
An uneven setup can affect tonearm movement and tracking, depending on the turntable's design and the degree of tilt. For the best starting point, position the turntable on a level surface before making any tonearm or cartridge adjustments.
For a quick check:
- Place the turntable on its intended surface.
- Check that the furniture itself is stable and level.
- If your model's instructions allow it, use a small bubble level to check the platter or the designated leveling surface.
- Adjust the furniture or approved leveling feet as needed, then check again.
A visual check can help you spot an obvious tilt, but a small bubble level provides a more reliable reference. Always follow your turntable's manual, and avoid changing tonearm or cartridge settings simply to compensate for an uneven surface.
Consider Your Listening Space
Your turntable should fit naturally into your home while remaining easy to use.
Whether you're setting up in a living room, bedroom, home office, or reading corner, look for a spot that gives you enough room to lift the dust cover, handle records comfortably, and reach the controls without moving the equipment.
A few practical details can make everyday listening easier:
- Leave enough space around the turntable for safe record handling.
- Keep power and audio cables tidy without stretching or pinching them.
- Choose a location away from direct heat and moisture.
- Store records upright in a suitable place, rather than stacking heavy objects on top of them.
With a little planning, your turntable can become a natural part of your listening space without sacrificing convenience or proper setup.
Expert Tip: Reduce Speaker Vibration
If you're using separate speakers, avoid placing them directly on the same lightweight surface as your turntable whenever possible.
Speakers can transmit vibration through furniture, while sound energy—particularly strong bass—can sometimes feed back into the turntable and create unwanted low-frequency noise.
To reduce the risk:
- Place speakers on a separate, stable surface when practical.
- Leave some distance between the speakers and the turntable, then adjust their positions if you notice humming or bass feedback.
- Make sure the turntable's furniture does not wobble when music is playing.
- Consider suitable isolation pads or supports if vibration remains a problem.
There is no single speaker distance that works for every room or system, so use your listening results as a guide. If your turntable has built-in speakers, follow the placement recommendations for your specific model.
Once your turntable is stable, level, and positioned away from avoidable sources of vibration, you're ready to move on to the physical setup.
3. Install the Platter and Drive Belt (If Required)
Some turntables use a belt-drive system, in which a rubber belt connects the motor to the platter and helps rotate the record at the selected playback speed. Other models use direct drive and do not require a belt.
Before you begin, check your turntable's manual to confirm whether the platter or drive belt needs to be installed. Some models arrive partially assembled, with certain components already in place.
Step-by-Step Platter and Belt Installation
If your turntable requires manual belt installation, follow the setup instructions for your specific model. The general process is:
- Position the platter. Place the platter onto the spindle as directed in the user manual. Make sure it sits correctly without forcing it into place.
- Locate the motor pulley. Identify the small pulley connected to the motor. Its position and appearance vary by model.
- Position the belt. Fit the drive belt around the designated inner rim or belt track of the platter, following the manufacturer's instructions.
- Connect the belt to the motor pulley. If your platter has an access opening, use it to guide the belt onto the pulley as instructed. Make sure the belt lies flat and is not twisted.
- Check the installation. Confirm that the platter is seated properly and that the belt follows the intended path. Install the platter mat or slip mat as directed.

Before connecting the power, double-check that the belt is correctly positioned and that no packaging material remains around the platter or motor.
Important: Do not stretch the belt excessively, force the platter onto the spindle, or adjust the mechanism while the turntable is powered on. If the belt does not fit as expected, consult your model's instructions rather than forcing it into place.
Why Do Some Turntables Use Belt Drive?
In a belt-drive turntable, the motor transfers rotation to the platter through a flexible belt. This design can help isolate some motor vibration from the platter, although actual performance depends on the turntable's overall engineering and condition.
Potential Advantages
- Vibration isolation: The belt can help reduce the transfer of certain motor vibrations to the platter.
- Quiet playback: A well-designed, properly maintained system can operate with low mechanical noise.
- Straightforward home listening: Belt-drive turntables are available in a wide range of designs for everyday vinyl playback.
Things to Keep in Mind
- The belt is a wear item: It may eventually need replacement, depending on its material, use, and storage conditions.
- Belt condition matters: A worn, stretched, contaminated, or incorrectly installed belt may contribute to speed instability.
- Maintenance varies by model: Follow the manufacturer's guidance for belt inspection, cleaning, and replacement.
Belt drive is one established way to design a turntable, but it is not automatically better than direct drive. The quality of the overall design, correct setup, and proper maintenance all contribute to reliable playback.
Once the platter and belt are correctly installed, you're ready to move on to the tonearm and cartridge checks required by your particular turntable.
4. Check the Tonearm and Set Tracking Force
Tonearm setup can make many beginners nervous. The tonearm looks delicate, and it holds one of the most sensitive parts of your turntable: the cartridge and stylus.
The good news is that you don't need to adjust every turntable yourself. Some models arrive with the tonearm and cartridge pre-configured, while others require manual balancing and tracking-force adjustment before use.
Before making any adjustments, check your turntable's user manual. If your model is factory-calibrated and the instructions do not call for further adjustment, leave the settings as they are.
Why Tracking Force Matters
Tracking force is the downward force the stylus applies to the record groove during playback. Using the correct setting helps the stylus follow the groove reliably and reproduce sound as intended.
If the tracking force is too high, it may increase wear on the stylus and record. If it is too low, the stylus may not track the groove reliably, potentially causing skipping, distortion, or other playback problems.
The correct setting depends on your cartridge and turntable. Always follow the recommended tracking-force range specified by the cartridge manufacturer or your turntable's instructions. Lighter is not automatically better.
Step-by-Step Tonearm Setup
Follow these steps only if your turntable requires manual tonearm balancing and tracking-force adjustment. The exact procedure varies by model, so use the manufacturer's instructions as your primary guide.
Step 1: Prepare the Turntable
Place the turntable on a stable, level surface and make sure it is switched off.
Secure the tonearm in its rest before preparing the controls. Handle the tonearm and cartridge carefully, and follow the manual's instructions for using the stylus guard.
Step 2: Release the Tonearm Lock
When the instructions call for balancing, carefully release the tonearm from its rest. Keep the stylus away from the platter and any hard surfaces.
Avoid touching the stylus itself or applying pressure to the cartridge.
Step 3: Check the Counterweight
If your model has a user-adjustable counterweight, follow the manual to install or position it correctly. Some turntables have a fixed counterweight or a different adjustment mechanism, so do not force or dismantle any components.
Step 4: Balance the Tonearm, If Required
For turntables that use manual balancing, the instructions may direct you to adjust the counterweight until the tonearm floats horizontally without rising or falling.
If your model has an adjustable anti-skate control, set it to the position specified in the manual for this balancing step. Some turntables do not have a user-adjustable anti-skate control.
Make adjustments slowly and carefully. Keep the stylus clear of the platter, and never force the tonearm to move.
Step 5: Set the Tracking Force
Once the tonearm has been balanced according to the manufacturer's procedure, set the tracking force to the recommended value for your cartridge.
On some turntables, this involves setting a numbered scale on the counterweight; others use a different adjustment method. Follow the instructions for your model rather than assuming that all counterweights work the same way.
If your instructions recommend a separate tracking-force gauge, use one that is suitable for your cartridge and follow its directions.
Step 6: Check Any Additional Settings
If your turntable has an adjustable anti-skate control, set it as directed by the manufacturer after setting the tracking force. If the feature is absent or factory-set, do not attempt to add or alter it.
Before playing a record, confirm that the tonearm returns to its rest securely and that all required setup checks are complete.
Beginner Mistake to Avoid
A common mistake is assuming that every new turntable needs its counterweight adjusted—or, conversely, assuming that every model is correctly set up straight out of the box.
Neither assumption applies to every turntable. Some models are ready to use with minimal setup, while others require specific adjustments.
For the best starting point:
- Check whether your model requires manual tonearm balancing.
- Use the recommended tracking force for your cartridge.
- Follow the manufacturer's instructions for anti-skate and other adjustable settings.
- Avoid changing factory settings unless the manual calls for it.
Correct setup helps the stylus track the record as intended and reduces the risk of avoidable playback problems. Once these checks are complete, you're ready to connect your audio equipment and prepare for your first record.
5. Connect Your Turntable to Speakers
Once the mechanical setup is complete, it's time to connect your turntable to an audio system.
The right connection depends on your turntable's built-in features and the type of speakers or amplifier you use. Before connecting any cables, check whether your turntable has a built-in phono preamp and review the input options on your audio equipment.
If you're unsure which connections your model supports, review the AUDURA Setup Guide before changing your audio settings.
Option 1: Connect to Powered Speakers
Powered speakers are a convenient choice for beginners because they have built-in amplification and do not require a separate power amplifier.
However, your turntable must provide the right type of signal for the speakers' inputs.
If your turntable has a built-in phono preamp, set its output to LINE if your model provides a PHONO/LINE switch, then connect it to a compatible line-level input on your powered speakers.
The typical connection is:
Turntable with built-in phono preamp (LINE output) → Powered speakers (LINE input)
If your turntable does not have a built-in phono preamp, you will usually need one between the turntable and the speakers:
Turntable (PHONO output) → External phono preamp → Powered speakers (LINE input)
Check your equipment's manuals to confirm which connections are supported. Some powered speakers have additional inputs or built-in phono stages, so the exact setup may vary.
Why Choose Powered Speakers?
- Fewer components: No separate power amplifier is needed.
- Simple setup: Fewer devices and cables can make installation easier.
- Flexible placement: Compact models can work well in bedrooms, apartments, and living rooms.
- Easy everyday listening: A straightforward system lets you focus on enjoying your records.
For listeners who prefer a clean, uncomplicated setup, powered speakers can be a practical option.
Option 2: Connect a Receiver or Amplifier to Passive Speakers
If you prefer a traditional hi-fi system, you can connect your turntable to an amplifier or receiver and use passive speakers.
Passive speakers require an external amplifier to drive them. Whether you also need a separate phono preamp depends on your turntable and amplifier.
Here are three common connection paths:
If your turntable has a built-in phono preamp:
Turntable (LINE output) → Amplifier or receiver (LINE input) → Passive speakers
If your turntable does not have a built-in phono preamp and your amplifier has a PHONO input:
Turntable (PHONO output) → Amplifier or receiver (PHONO input) → Passive speakers
If your turntable does not have a built-in phono preamp and your amplifier has no PHONO input:
Turntable (PHONO output) → External phono preamp → Amplifier or receiver (LINE input) → Passive speakers
A traditional system offers flexibility when choosing or upgrading individual components, but it may require more equipment, cables, and space.
Understand the PHONO and LINE Settings

One common setup mistake is connecting the turntable's output to the wrong input.
A turntable cartridge produces a low-level PHONO signal that needs the appropriate amplification and equalization before it can be used by a standard line-level input. Many turntables include a built-in phono preamp that performs this function.
If your turntable has a PHONO/LINE switch, use the following guidance:
- LINE output: Connect to a compatible LINE or AUX input on an amplifier, receiver, or powered speaker.
- PHONO output: Connect to a PHONO input or to an external phono preamp.
- Built-in phono preamp: Check whether it is enabled and which output mode your model requires.
Do not connect a PHONO output directly to a standard LINE input unless your equipment specifically supports that connection. Likewise, avoid connecting a LINE output to a PHONO input, as the additional phono amplification and equalization may cause excessive volume or distortion.
If your turntable does not have a PHONO/LINE switch, check the manual rather than assuming that it can change output modes.
Quick Troubleshooting Before You Play a Record
If the sound does not seem right, check these common issues first:
- Very low volume: Check whether a phono preamp is required and whether the turntable is connected to the correct input.
- Distorted or unusually loud sound: Confirm that a LINE output is not connected to a PHONO input.
- No sound: Check the power supply, cable connections, selected input, and speaker volume.
- Weak or unusual bass: Verify the PHONO/LINE configuration and the connections specified in your equipment manuals.
Before playing a record, make sure the cables are securely connected, the correct input is selected, and the volume is set to a low level. You can then raise it gradually to a comfortable listening level.
Once your audio connections are correct, you're ready to check the playback settings and prepare for your first record.
6. Fine-Tune Your Turntable Setup for Better Sound
Once your turntable is connected and ready to play, a few simple adjustments can help you get more out of your vinyl listening experience.
You don't need an elaborate audiophile system to get started. Before buying additional equipment, check the basics: speaker placement, turntable stability, and unwanted vibration. These factors can affect how your system sounds and how reliably your records play.
The best setup is one that works well with your equipment, your room, and the way you listen to music.
Adjust Your Speaker Placement
If you're using separate stereo speakers, their placement can influence stereo imaging, tonal balance, and the overall listening experience.
Use these suggestions as a starting point, then adjust according to your room and the recommendations for your speakers:
- Aim for a comfortable listening height. Position the speakers so their recommended listening axis is directed toward your seated listening position. For many speakers, this means placing the tweeters near ear level.
- Keep the left and right speakers balanced. Start by placing them at similar distances from your main listening position.
- Try a stereo triangle. As a starting point, position the two speakers and your listening seat at the three corners of an approximately equal-sided triangle. Adjust the spacing and angle to suit your room.
- Experiment with distance from the walls. Some speakers perform well close to a wall, while others benefit from more space. Follow the manufacturer's placement guidance and listen for changes in bass response.
- Keep the turntable away from direct speaker vibration. If possible, place the speakers on a separate, stable surface rather than sharing a lightweight cabinet with the turntable.
Small adjustments can make a noticeable difference, so try changing one thing at a time and listen to the results.
Small-Room Tip: Make the Most of Your Space
You don't need a dedicated listening room to enjoy vinyl. A bedroom, apartment living room, or compact home office can all work well with thoughtful placement.
If space is limited:
- Choose a stable location for your turntable with enough room to handle records comfortably.
- Give separate speakers as much practical separation as your room allows.
- Keep the listening position reasonably centered between the speakers when possible.
- Use rugs, curtains, and upholstered furniture to help reduce some reflections in a room with many hard surfaces.
Soft furnishings can make a room feel less acoustically harsh, although they won't solve every room-acoustics problem. Start with practical changes before considering specialized acoustic treatments.
A compact setup can still provide an enjoyable listening experience. Focus on stability, sensible speaker placement, and a layout that works for everyday use.
Reduce Unwanted Vibration
A turntable's stylus follows the tiny grooves in a record, so unwanted vibration can sometimes interfere with playback. Depending on the setup, vibration may contribute to rumble, low-frequency feedback, or skipping.
Common sources include:
- Speakers transmitting vibration through shared furniture.
- Footsteps on a flexible floor or an unstable cabinet.
- Furniture that wobbles or resonates.
- Nearby appliances or other equipment that produce noticeable vibration.
Simple Ways to Improve Stability
Try these practical steps before investing in additional accessories:
- Use a stable, level surface. Choose furniture that supports the turntable securely and does not wobble during normal use.
- Separate the speakers when practical. Placing speakers on a different stable surface can help reduce vibration transmitted directly through the furniture.
- Check what happens during playback. If bass-heavy music causes a low rumble or feedback, try repositioning the speakers or turntable and listen for a change.
- Minimize unnecessary movement. Avoid bumping the turntable or its supporting furniture while a record is playing.
- Check the equipment if problems persist. Skipping can have several causes, including record condition, stylus condition, and model-specific tracking adjustments. Consult your turntable's manual before changing any settings.
Some listeners use isolation pads or dedicated platforms to address persistent vibration, but these accessories are not essential for every beginner. First make sure your turntable is correctly installed and positioned on a stable surface.
The key is to start with the basics. A well-positioned turntable, sensible speaker placement, and a stable listening area provide a good foundation for enjoying your records.
With your setup in place, you're ready to move on to the final checks before playing your first vinyl record.
7. Clean Your Records and Stylus Before Listening
A good turntable setup involves more than connecting your equipment. Keeping your records and stylus clean is also an important part of regular vinyl care.
Dust, loose particles, and other contaminants can contribute to pops, clicks, and unwanted surface noise during playback. A dirty stylus may also affect tracking and sound quality. However, not every click or pop is caused by dust—record wear, scratches, static, and setup issues can also play a role.
A few simple habits can help keep your records in better condition and make everyday listening more enjoyable.
Basic Vinyl Care Routine
Before playing a record, follow these simple steps:
- Remove the record carefully. Slide it out of its sleeve without dragging the playing surface against the sleeve unnecessarily.
- Hold it by the edges and label. Avoid touching the grooves as much as possible to reduce the transfer of skin oils and other contaminants.
- Remove loose dust. Use a clean carbon fiber record brush designed for vinyl. Follow the brush manufacturer's instructions and avoid pressing too hard against the record.
- Check the record before playback. If you notice visible dirt or residue that a dry brush cannot remove, consider using a record-cleaning method specifically designed for vinyl.
- Store the record properly. After listening, return it to a clean inner sleeve and store it upright in a suitable outer sleeve or record-storage system.
A carbon fiber brush is useful for routine dust removal, but it may not remove fingerprints, oily residue, or deeply embedded dirt. For more thorough cleaning, use a vinyl-compatible cleaning solution or record-cleaning system according to its instructions.
Avoid household cleaners, paper towels, and abrasive materials. These may leave residue or scratch the record. If you use a wet-cleaning method, make sure the record is completely dry before putting it back into its sleeve.
With consistent care, you can reduce avoidable contamination and help keep your record collection in good condition.
For routine vinyl maintenance, explore record-cleaning tools designed to help remove loose dust and care for your records and stylus.
Keep Your Stylus Clean
The stylus—often called the needle—is the small contact point that follows the grooves of a record. Dust and fibers can accumulate around it, so occasional inspection and careful cleaning are worthwhile.
A stylus brush designed for your cartridge can help remove loose debris. Follow the cartridge or turntable manufacturer's cleaning instructions, as stylus assemblies and recommended methods can vary.
For routine cleaning:
- Turn off the turntable. Stop playback before cleaning the stylus.
- Use a suitable stylus brush. Make sure the brush is clean and intended for stylus maintenance.
- Brush gently in the recommended direction. For many stylus brushes, this means moving from the rear of the cartridge toward the front, following the direction specified by the manufacturer.
- Use minimal pressure. The stylus assembly is delicate, so never push, pull, or scrub it forcefully.
- Check the result. If debris remains or you are unsure how to clean your particular cartridge, consult the manufacturer's instructions rather than attempting more aggressive cleaning.

Common Stylus-Cleaning Mistakes to Avoid
- Brushing from side to side: Lateral movement can put unwanted stress on the stylus assembly.
- Applying excessive pressure: The cantilever and stylus are delicate components.
- Using an unsuitable liquid or solvent: Some cleaning products may damage the stylus assembly, adhesive, or cartridge materials.
- Touching the stylus with your fingers: This can transfer oils and may damage the delicate assembly.
- Cleaning while the turntable is playing: Stop playback before handling or cleaning the stylus.
Do not assume that every stylus-cleaning gel, liquid, or accessory is suitable for every cartridge. When in doubt, use the method recommended by the manufacturer.
A simple rule to remember: Keep records in clean sleeves, remove loose dust before playback, and clean the stylus gently when needed. These small habits help maintain your vinyl setup without making record care complicated.
Once your record and stylus are ready, you can move on to checking the playback settings and enjoying your first side of vinyl.
8. Common Turntable Setup Mistakes Beginners Make
If your turntable doesn't sound or perform as expected, the problem may be a simple setup issue rather than a faulty device.
Before buying new equipment or making major adjustments, check these common beginner mistakes. A few basic checks can help you identify the cause and get back to enjoying your records.
If you've checked the basics and the problem persists, consult the AUDURA Troubleshooting Guide for help with common playback and connection issues.
Mistake #1: Adjusting the Tonearm Incorrectly—or Skipping Required Setup
Some turntables arrive with the cartridge installed and key settings adjusted at the factory. Others require the user to install the counterweight, balance the tonearm, or set the tracking force before playback.
Skipping a required setup step—or changing settings that were already correctly adjusted—can affect tracking and sound quality.
Possible signs:
- The stylus repeatedly skips or mistracks.
- Playback sounds distorted.
- The tonearm does not move or rest as expected.
How to fix it:
Check your model's setup instructions before adjusting anything. If tracking-force adjustment is required, use the recommended setting for your cartridge. Only adjust anti-skate or other tonearm settings if your model has them and its manual explains how to set them.
Do not guess at the tracking force or change factory settings unnecessarily. If skipping continues, inspect the record and stylus and follow the manufacturer's troubleshooting instructions.
Mistake #2: Placing the Turntable on an Unstable or Uneven Surface
A turntable needs a stable, level surface to perform reliably. Furniture that wobbles, flexes, or transmits excessive vibration can interfere with playback.
Possible signs:
- Playback is affected when someone walks nearby.
- The turntable or its supporting furniture visibly wobbles.
- Bass-heavy music produces unwanted low-frequency rumble or feedback.
How to fix it:
Choose a sturdy, level surface that can safely support the turntable. Keep it away from avoidable sources of vibration, and place separate speakers on a different stable surface when practical.
A dedicated listening room is not necessary. What matters most is that the turntable is properly supported and positioned according to the manufacturer's recommendations.
Mistake #3: Connecting the Turntable to the Wrong Audio Input
A common beginner question is: “Why is my turntable so quiet?”
One possible cause is a mismatch between the turntable's output and the connected audio equipment. A cartridge's PHONO signal needs suitable amplification and equalization before it can be connected to a standard LINE input.
How to fix it:
First, check whether your turntable has a built-in phono preamp and whether it has a PHONO/LINE output switch.
- Turntable set to LINE: Connect it to a compatible LINE or AUX input.
- Turntable outputting PHONO: Connect it to a PHONO input or an external phono preamp.
- Using powered speakers: Confirm that the signal reaching the speakers is compatible with their inputs.
- Using passive speakers: Make sure an appropriate amplifier is connected.
If the sound is unusually quiet, distorted, or absent, also check the selected input, cable connections, power supply, and speaker volume.
Refer to your equipment's manuals before changing output settings. Not every turntable has a built-in phono preamp or a switchable output.
Mistake #4: Playing a Record at the Wrong Speed
Turntables commonly support 33⅓ RPM and 45 RPM, but the correct speed depends on the record. Some records, including certain older releases, use 78 RPM and require compatible playback equipment.
Playing a record at the wrong speed changes the music's pitch and timing.
How to fix it:
- Check the record label or release information for the intended playback speed.
- Select the corresponding speed on your turntable.
- Confirm that your model supports that speed before playing the record.
Don't assume that every album uses 33⅓ RPM or that every single uses 45 RPM. Check the specific record rather than relying on its format or size alone.
Mistake #5: Expecting Vinyl to Sound Exactly Like Streaming
Vinyl and digital playback use different formats and playback processes, so their sound may differ depending on the recording, mastering, equipment, and listening environment.
Records can have audible surface noise, pops, or clicks, but these are not inevitable signs of vinyl playback. Excessive noise, persistent distortion, or repeated skipping may indicate a dirty or damaged record, a dirty or worn stylus, incorrect setup, or another issue that needs attention.
How to fix it:
- Clean records and the stylus using suitable methods.
- Confirm that the turntable is set up according to the manufacturer's instructions.
- Check the playback speed and audio connections.
- If problems persist, troubleshoot the record, stylus, and equipment before assuming the sound is normal for vinyl.
The goal isn't to make every record sound identical to a digital stream. It's to set up your system correctly, understand the characteristics of the format, and enjoy the listening experience without overlooking problems that can be fixed.
By checking these common issues first, you'll have a more reliable foundation for enjoying your vinyl collection.
9. Your 15-Minute Turntable Setup Checklist
Ready to get started? Use this checklist to work through the essential steps before playing your first record.
Keep in mind: 15 minutes is a target, not a guarantee. Setup time depends on your turntable model, how much assembly is required, and whether your speakers or other audio equipment are already connected. Some turntables arrive largely assembled, while others require additional adjustments.
Always follow the instructions for your specific model. If a step doesn't apply to your turntable, skip it rather than making unnecessary adjustments.

Minutes 0–3: Prepare Your Space
- Choose a stable, level surface that can support your turntable.
- Position the turntable away from avoidable sources of vibration.
- Check which audio connections your turntable and speakers support.
- Confirm that you have the accessories and instructions required for your model.
Minutes 3–7: Assemble the Turntable
- Install the platter according to the manufacturer's instructions, if required.
- Fit the drive belt if your model uses a belt-drive system and requires manual installation.
- Install the platter mat or slip mat as directed.
- Remove all shipping materials and protective packaging.
- Check that the platter is seated correctly and any required belt is positioned properly.
Minutes 7–10: Check the Tonearm and Cartridge
- Check whether the tonearm and cartridge are already installed and adjusted.
- Install or adjust the counterweight only if your model's instructions require it.
- Set the tracking force to the cartridge manufacturer's recommended value if manual adjustment is necessary.
- Check the anti-skate setting if your turntable has this adjustment and its instructions require it.
- Confirm that the stylus and cartridge are secure, and leave any stylus guard in place until you're ready to play a record.
Important: Do not rebalance a factory-adjusted tonearm or change its settings unnecessarily. If you're unsure whether an adjustment is needed, consult your model's manual before proceeding.
Minutes 10–13: Connect Your Audio Equipment
- Make sure the turntable and audio equipment are switched off before connecting cables.
- Connect the turntable to compatible powered speakers or to the appropriate phono preamp, amplifier, and speakers.
- Check that the PHONO/LINE configuration matches the input you're using, if your model has a switchable output.
- Connect the power supply according to the manufacturer's instructions.
- Select the correct input on your speakers or amplifier and start with a low volume.
Minutes 13–15: Prepare for Your First Playback
- Choose a clean record and remove it from its sleeve by holding the edges and label.
- Remove loose surface dust with a suitable record brush if needed.
- Select the playback speed indicated on the record or in its release information.
- Remove the stylus guard carefully when you're ready to play, if your model has one.
- Place the record on the platter and lower the stylus gently using the tonearm cueing mechanism, if available.
- Start playback and listen for normal sound, unusual noise, or skipping.
If something doesn't sound right, stop playback and check the relevant setup instructions before making adjustments.
For additional model-specific setup help, visit the AUDURA Setup Guide.
Ready for Your First Spin?
Congratulations! Your turntable is ready for its first record once you've completed the steps that apply to your model.
Take your time, handle your records carefully, and enjoy discovering your vinyl collection—one side at a time.
10. Creating a Modern Vinyl Setup That Fits Your Home
A vinyl setup doesn't need a dedicated listening room or a large collection of audio equipment. With thoughtful placement and the right combination of components, you can make listening to records part of your everyday routine.
For many listeners, the ideal setup balances four things:
- Enjoyable sound: Choose equipment that suits your listening habits and available space.
- Simple operation: Make it easy to put on a record and start listening.
- Thoughtful design: Select a setup that complements your home's style.
- Practical storage: Keep records, accessories, and cables organized without crowding your space.
These considerations are especially useful in apartments, bedrooms, and smaller living areas, where every part of the setup needs to serve a purpose.
Minimalist Vinyl Setup Ideas
You don't need many components to create a welcoming place to enjoy records. Start with the essentials and arrange them around the way you actually listen to music.
A simple modern setup might include:
- A stable console or shelf: Choose a surface that supports your turntable securely and leaves enough room to handle records.
- Compact speakers: Powered speakers can reduce the number of separate components you need. Check that their inputs are compatible with your turntable's output.
- Convenient record storage: Keep your most-played albums nearby and store records upright in a suitable space.
- Neat cable management: Arrange power and audio cables so they are tidy, accessible, and not stretched or pinched.
- Comfortable lighting and seating: Create a listening area that feels inviting without interfering with access to your equipment.
If you're short on space, prioritize stability and ease of use over adding more accessories. Leave enough room to lift the dust cover, change records, and reach the turntable controls comfortably.
For separate-speaker systems, also consider how the speakers are positioned relative to the turntable and your listening seat. A clean-looking arrangement should still support reliable playback and a comfortable listening experience.
Ultimately, the best setup is one you'll want to use regularly. A thoughtfully arranged system can make playing a record feel simple rather than like another task to complete.
Why Easy Setup Matters
Part of the appeal of vinyl is the experience of choosing a record, placing it on the platter, and taking time to listen. That experience should feel rewarding—not unnecessarily complicated.
For beginners, a straightforward setup can make it easier to build a listening habit. For experienced listeners, a well-organized system can make everyday playback more convenient.
When choosing a turntable, consider more than its appearance. Look at the controls, setup requirements, audio connections, speaker compatibility, and the space available in your home. The right combination depends on your priorities and the equipment you already own.
A Vinyl Experience Designed for Modern Homes
At AUDURA, we believe a turntable should fit naturally into the way people live and listen to music. A considered design, clear setup guidance, and a system that suits your space can help make vinyl more approachable for everyday listening.
Whether you're building a compact setup for an apartment or creating a dedicated corner for your record collection, start with the essentials and choose equipment that fits your needs.
Explore the AUDURA turntable collection to compare available models and find a setup that works for your home.
11. When Should You Upgrade Your Turntable Setup?
If you've just bought your first turntable, you may be wondering whether you need better speakers, a separate phono preamp, or other accessories right away.
In most cases, there's no need to rush. Before spending more money, make sure your current setup is correctly installed, connected, and maintained. Understanding how your system performs today will help you identify what—if anything—would make a meaningful difference.
What to Improve Before Buying New Equipment
1. Keep Your Records and Stylus Clean
Dust, contamination, and a worn stylus can affect playback. Before replacing equipment because of unwanted noise or inconsistent sound, check the condition of your records and stylus and follow the recommended cleaning and maintenance procedures.
Cleaning can help address certain problems, but it won't repair scratched or worn records. If playback issues continue, investigate the cause before assuming that you need an upgrade.
2. Fine-Tune Your Listening Setup
Speaker placement, turntable stability, and the listening environment can all influence your experience.
Try adjusting your speaker positions, checking that the turntable is level, and reducing unwanted vibration before investing in additional equipment. These simple checks may help you get more out of the system you already own.
3. Learn What Your Current System Can Do
Spend some time listening to different records and become familiar with your setup.
Notice whether you experience a specific issue, such as insufficient volume, unwanted noise, limited bass response, or a lack of flexibility in connecting other audio sources. Also check your equipment's specifications and instructions so you understand which features are already available.
Knowing what you want to improve makes it easier to choose an upgrade for a clear reason rather than buying accessories simply because they're available.
Signs It May Be Time to Upgrade
An upgrade may make sense when:
- You have a specific performance goal. You want a change in sound, greater flexibility, or features your current equipment doesn't provide.
- Your listening habits have changed. You listen more often or want to build a more capable home audio system.
- Your current setup has a clear limitation. For example, you need a different type of audio connection, more suitable speakers, or an amplifier to support passive speakers.
- Your equipment needs replacing. A worn stylus, damaged cable, or deteriorating belt may call for maintenance or replacement rather than a complete new system.
- You understand your preferences. You have enough listening experience to identify what you would like to improve and why.
Not every problem requires a new turntable. Sometimes, replacing a worn component or correcting a connection is all that's needed.
If you have identified a specific limitation in your current setup, explore compatible turntable upgrades before replacing your entire system.
Choose Upgrades That Solve a Real Problem
Before making a purchase, identify the limitation you're trying to address and check whether your existing equipment can already solve it.
For example, if your system lacks sufficient volume, first check the connections, input settings, and speaker capabilities. If you want more flexibility, compare the audio inputs and outputs available on your current equipment. If playback has become noisy or unreliable, inspect the record, stylus, belt, and setup before replacing the entire system.
A gradual upgrade path can help you spend more thoughtfully and avoid buying components that don't suit your setup.
The best upgrade is one that improves something you can actually identify and hear—or adds a feature you genuinely need. Until then, enjoy your records, learn your equipment, and let your listening experience guide your next step.
FAQ: Turntable Setup Questions Beginners Ask
1. How long does it take to set up a turntable?
Many turntables can be set up in around 15 minutes, particularly if they arrive mostly assembled and your audio equipment is ready to connect. The process may include installing the platter, checking the tonearm settings, connecting speakers, and selecting the correct playback settings. Models that require more assembly or manual adjustment may take longer.
2. Do I need speakers with a turntable?
You need a way to hear the audio, but you don't necessarily need separate speakers. Some turntables have built-in speakers, while others connect to powered speakers or an amplifier and passive speakers. Check whether your turntable needs a phono preamp and make sure its output is compatible with the audio equipment you use.
3. Why does my new turntable sound quiet?
A low volume level may indicate a connection or configuration issue. Check that the turntable is connected to the correct input, that a phono preamp is being used when required, and that your speakers or amplifier are powered on with the volume set appropriately. If your turntable has a PHONO/LINE switch, make sure its setting matches the connected input.
4. Do I need to balance the tonearm on a new turntable?
Not always. Some turntables arrive with the tonearm and cartridge already installed and adjusted, while others require manual setup. Check your model's instructions before changing anything. If tracking-force adjustment is required, use the recommended setting for your cartridge and adjust anti-skate only if your turntable has that feature and its manual explains how to set it.
5. Where is the best place to put a turntable?
Choose a stable, level surface that can support the turntable securely. Keep it away from avoidable sources of vibration, and consider placing separate speakers on a different stable surface. Leave enough room to handle records comfortably and access the turntable controls.
6. Can I put my turntable in an apartment?
Yes. You can enjoy vinyl in an apartment without a dedicated listening room. Choose a stable location, arrange your speakers to suit the available space, and keep your records and cables organized. If vibration or bass feedback becomes a problem, try adjusting the position of the turntable and speakers.
7. Why is my record skipping?
Skipping can have several causes, including dust on the record or stylus, a scratched or damaged record, incorrect tracking force, or vibration from an unstable surface. Check the record and stylus first, then review the setup instructions for your model. Avoid changing tonearm settings unless the manual indicates that an adjustment is needed.
8. What is the easiest turntable setup for beginners?
A turntable with straightforward setup instructions and features that match your needs is a good starting point. A model with built-in speakers can minimize additional equipment, while a turntable paired with compatible powered speakers can also provide a simple setup. Before choosing, check the model's audio connections, built-in features, and assembly requirements.
Conclusion: A Better Vinyl Experience Begins With Simple Setup
Setting up a turntable doesn't have to feel technical or overwhelming. With a suitable location, the right audio connections, and a few model-specific checks, you can build a vinyl setup that's easy to use and enjoyable to listen to.
Before playing your first record, remember to:
- Place your turntable on a stable, level surface.
- Check the tonearm and tracking settings according to your model's instructions.
- Connect your speakers and audio equipment using the correct inputs.
- Keep your records and stylus clean with appropriate care.
- Arrange your listening space to minimize unwanted vibration and make everyday listening comfortable.
A great vinyl experience isn't about owning the most expensive equipment. It's about choosing a setup that suits your space, meets your listening needs, and brings you closer to the music you love.
Whether you're setting up your first record player or refining an existing system, getting the basics right is a practical first step toward more reliable playback and a more enjoyable listening experience.
Ready for your next step? Explore the AUDURA Setup Guide for more help getting started, or visit our Troubleshooting Guide if you need help resolving a playback issue.
If you're still choosing your equipment, explore the AUDURA turntable collection to compare available models and find an option that fits your home and listening preferences.
Take your time, put on a favorite record, and enjoy the experience—one side at a time.